

There’s something undeniably comforting about the aroma of freshly baked chocolate chip cookies wafting through the kitchen. It’s a scent that promises gooey centers, crisp edges, and a taste that takes you back to childhood.
Inspired by the classic recipes and a nod to the expertise from Handle the Heat, we’re diving into the art of creating the ultimate Bakery Style Chocolate Chip Cookies. This recipe is not just about satisfying your sweet tooth; it’s about recreating that magical bakery charm right in your own kitchen.
Chocolate chip cookies are more than just a treat; they’re a universal symbol of comfort and joy. Whether it’s a family gathering, a casual meet-up with friends, or a moment of solitude with a cup of tea, these cookies fit perfectly into every scenario.
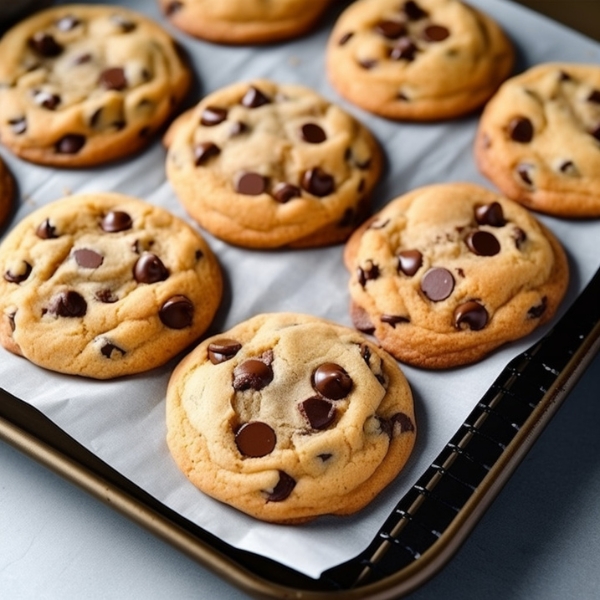
What sets bakery-style cookies apart is their irresistible combination of a golden-brown crust and a soft, melt-in-your-mouth center. It’s a culinary experience that brings a touch of gourmet to your everyday life.

Ingredients:
The secret to exceptional chocolate chip cookies lies in the quality and balance of ingredients. Here’s what you’ll need to bring these delightful treats to life:
- All-Purpose Flour: 3 cups (380 grams) – the base of your cookie structure.
- Baking Soda: 1 teaspoon – for that perfect rise.
- Fine Sea Salt: 1 teaspoon – to balance and enhance the flavors.
- Unsalted Butter: 2 sticks (227 grams), cool room temperature (67°F) – the key to a rich and tender crumb.
- Granulated Sugar: 1/2 cup (100 grams) – for sweetness and texture.
- Light Brown Sugar: 1 1/4 cups (247 grams), lightly packed – adds moisture and a hint of caramel.
- Vanilla Extract: 2 teaspoons – for that classic, aromatic flavor.
- Large Eggs: 2, at room temperature – binds the ingredients together.
- Semisweet Chocolate Chips: 2 cups (340 grams) – the star of the show.
Each ingredient plays a crucial role in creating the perfect cookie. The right balance of sugars ensures a chewy yet crisp texture, while the quality of butter and vanilla adds depth to the flavor profile. The chocolate chips, of course, are the bursts of joy in every bite.
A Step-by-Step Baking Guide:
Baking the perfect chocolate chip cookie is an art that combines the science of baking with a touch of personal flair. Here’s a detailed guide to help you create those bakery-style cookies that are sure to be a hit.
- Preheat and Prepare: Begin by preheating your oven to 350ºF (177ºC). This ensures a consistent temperature throughout the baking process. Line your baking sheets with parchment paper, which helps in easy removal of cookies and even browning.
- Mixing the Dry Ingredients: In a medium-sized bowl, whisk together 3 cups of all-purpose flour, 1 teaspoon of baking soda, and 1 teaspoon of fine sea salt. This step is crucial for evenly distributing the leavening agent and salt throughout the flour, which contributes to a uniform texture in your cookies.
- Creaming Butter and Sugars: In the bowl of an electric mixer, combine 2 sticks of unsalted butter at cool room temperature, 1/2 cup of granulated sugar, and 1 1/4 cups of lightly packed light brown sugar. Beat them together until creamy, which should take about 2 minutes. This process is essential for incorporating air into the batter, leading to lighter and softer cookies.
- Adding Eggs and Vanilla: To the creamed mixture, add 2 teaspoons of vanilla extract followed by 2 large eggs, one at a time. Ensure each egg is fully incorporated before adding the next. Eggs should be at room temperature to blend seamlessly into the mixture.
- Combining Dry and Wet Ingredients: Gradually add the dry ingredients to the wet mixture. It’s important to do this in stages to prevent overmixing, which can lead to tough cookies. Mix until just combined; some flour streaks are okay.
- Folding in Chocolate Chips: Stir in 2 cups of semisweet chocolate chips. Fold them gently into the batter to ensure they are evenly distributed without overworking the dough.
- Chilling the Dough (Optional but Recommended): If time allows, wrap the dough in plastic wrap and refrigerate for at least 24 hours, but no more than 72 hours. This step allows the flavors to meld and deepen, resulting in a more complex taste. It also helps in achieving thicker cookies with a chewier texture. Before baking, let the dough sit at room temperature just until it is soft enough to scoop.
- Shaping and Baking: Using a large cookie scoop, form the dough into 3-tablespoon sized balls. Place them on the prepared baking sheets, leaving enough space between each ball for the cookies to spread. Bake in the preheated oven for 11-13 minutes, or until the edges are golden brown but the centers are still soft.
- Cooling: Once baked, let the cookies cool on the baking sheet for 5 minutes. This allows them to set and makes them easier to transfer. After 5 minutes, move them to a wire rack to cool completely. This step is crucial for achieving that desirable crisp edge and gooey center.
Remember, every oven is different, so keep an eye on your cookies, especially the first batch. They should have a slight underbaked appearance in the middle when you take them out of the oven, as they will continue to cook on the baking sheet.
Now that your cookies are baked to perfection, let’s explore some additional tips and tricks to elevate your baking experience, along with the best ways to store and savor these delightful treats.
Customization and Variations:
Experiment with Chocolate: While semisweet chocolate chips are classic, feel free to experiment with different types of chocolate, like dark, milk, or even white chocolate chips. You can also mix in chocolate chunks for a more rustic texture.
Add Nuts or Dried Fruit: For a different twist, consider adding chopped nuts like walnuts or pecans, or even dried fruits like cranberries or raisins.
Vegan and Gluten-Free Options: To accommodate dietary preferences, you can substitute the all-purpose flour with a gluten-free blend and use vegan butter and egg substitutes.
Baking Tips:
Room Temperature Ingredients: Ensure your eggs and butter are at room temperature for a smoother batter.
Don’t Overmix: Mix the dough just until the ingredients are combined to avoid tough cookies.
Consistent Size: Use a cookie scoop for evenly sized cookies, which ensures uniform baking.
Oven Hot Spots: Rotate the baking sheet halfway through baking if your oven has hot spots, for even browning.
Serving:
Serving Warm: There’s nothing like enjoying these cookies warm. If they’ve cooled down, a quick 10-second zap in the microwave can bring back that fresh-from-the-oven taste.
Pairing: Serve with a glass of cold milk, a cup of coffee, or even a scoop of vanilla ice cream for a delightful dessert.
Storing:
Short-Term Storage: Store the cooled cookies in an airtight container at room temperature. They should stay fresh for up to 3 days.
Long-Term Storage: For longer storage, you can freeze the baked cookies or the dough. Frozen dough can be baked directly from the freezer, just add a couple of minutes to the baking time.
Reviving Cookies: If the cookies begin to harden, place a piece of bread or an apple slice in the container with them. The moisture from the bread or apple will help keep the cookies soft.
Baking is not just about following a recipe; it’s about creating moments of joy and sharing them with others. These Bakery Style Chocolate Chip Cookies are more than just a sweet treat; they’re a testament to the love and care put into baking them.
Whether you’re a seasoned baker or trying your hand at baking for the first time, this recipe is sure to bring a smile to your face and those you share them with.
Happy baking!